A clean car can still look tired when the headlights are yellow, hazy, or dull. Beyond appearance, that cloudy layer can reduce the amount of light reaching the road at night. Learning how to restore cloudy headlights can make your vehicle look better, help you see more clearly, and bring back some of that feel-good confidence behind the wheel.
Why headlights become cloudy
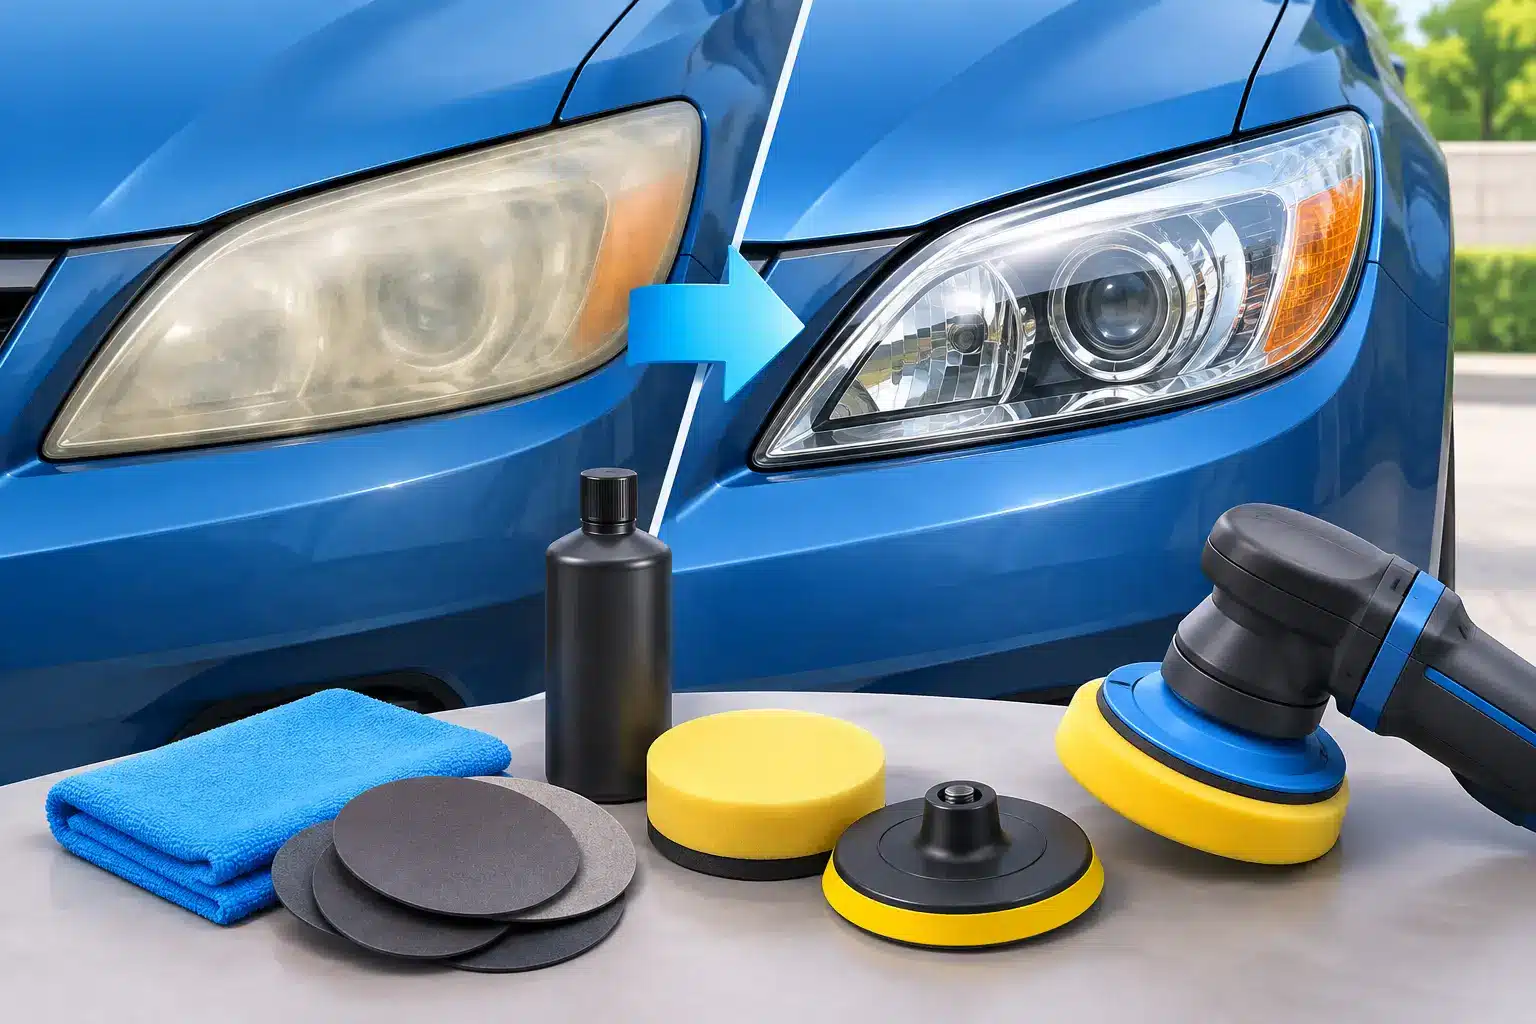
Most modern headlights have clear polycarbonate plastic lenses rather than glass. They are lightweight and durable, but years of sun exposure, heat, road salt, rain, bugs, and car wash debris can wear down their protective coating. The result is oxidation – the chalky, yellowish haze that forms on the outside of the lens.
Cloudiness is not always only on the surface. Moisture can sometimes get inside a headlight housing through a damaged seal, or the bulb itself may be dimming. If the lens looks foggy from the inside, cleaning the exterior will not solve the whole problem. That is a good reason to have the lights inspected before spending time on a DIY repair.
For many drivers around Germantown and Montgomery County, the first clue is simple: nighttime driving no longer feels as comfortable as it used to. A headlight restoration is a practical way to address that issue before the haze becomes severe.
How to restore cloudy headlights at home
A DIY restoration can work well when the cloudiness is mild to moderate and clearly sits on the outer surface. The key is not just polishing the lens. You need to remove the oxidized material evenly, refine the plastic, and protect it from UV exposure afterward.
Start by washing the headlights and the surrounding paint with automotive soap and water. Dry the area completely. Dirt left on the lens can create extra scratches while you work, and residue around the edges can make it harder for tape to stick.
Use painter’s tape to cover the painted panels, bumper edges, grille trim, and any nearby rubber. This step takes only a few minutes and can save you from accidentally scuffing the clear coat while sanding.
Choose a proper restoration kit when possible
A headlight restoration kit is usually the easiest route because it includes sandpaper or abrasive discs, polishing compound, and a final protectant. Follow the kit instructions closely, especially the recommended grit sequence. Some kits are designed for hand use, while others work with a drill attachment.
If the headlights are only lightly hazy, a polishing compound may be enough. Apply it with a clean microfiber or foam applicator, working in small sections with moderate pressure. Wipe the lens clean and check your progress before repeating.
For heavier yellowing, sanding is often necessary. Wet-sand the lens using the grit progression supplied with the kit, keeping the surface lubricated with water. Use straight, overlapping passes instead of random circles. The lens may look more uniformly dull during the sanding stage – that is normal, because you are leveling the damaged surface before polishing it clear again.
After sanding, polish until the lens becomes transparent. Then apply the included sealant, UV coating, or clear protective finish. This last step matters more than many people realize. Without UV protection, freshly restored headlights can begin oxidizing again much sooner.
Products and shortcuts that may disappoint
Toothpaste, baking soda, and household cleaners are popular online fixes because they can make a lens look brighter for a short time. Toothpaste contains mild abrasives, so it may remove a little surface grime. But it does not replace a proper sanding, polishing, and UV-protection process for significantly oxidized headlights.
Avoid using harsh solvents, glass cleaner with ammonia, dry paper towels, or aggressive scouring pads. These can scratch plastic, weaken coatings, or leave the lens looking worse in direct sunlight. Bug spray and brake fluid are sometimes suggested as shortcuts, but they are not safe headlight-restoration methods and can damage nearby paint and trim.
A quick improvement is not always a lasting improvement. If you are taking the time to work on your headlights, the protective coating is what helps protect that effort.
When professional headlight restoration makes more sense
DIY work can be satisfying, but it is not the best answer for every vehicle. Deep oxidation, peeling factory coating, cracks, pitting from road debris, and uneven previous repairs can require a more experienced hand. Some headlights also have tight curves and edges that make it easy to sand unevenly at home.
Professional restoration is especially worth considering if you have tried a kit before and the haze returned quickly. A detailer can evaluate whether the lens can be restored, whether a durable coating should be applied, or whether replacement is the safer option. If the lens is cracked or moisture is trapped inside the housing, replacement or repair may be necessary.
At Love My Car Carwash, headlight restoration is one of the focused services available for drivers who want a clearer, brighter finish without turning a weekend into a project. It is a convenient option when you want your vehicle to look cared for and your lights to perform their best.
How long restored headlights stay clear
There is no single timeline because exposure makes a difference. A car parked outside every day in Maryland sun and weather will generally need attention sooner than one kept in a garage. The quality of the final UV coating, how thoroughly oxidation was removed, and the condition of the original lens all affect longevity.
A properly restored and protected headlight can stay noticeably clearer for a long time, while an unprotected polish may fade much sooner. Think of the UV coating like sunscreen for the lens: it does not make the plastic invincible, but it helps slow down the damage that caused the haze in the first place.
Regular washing also helps. Road film, salt, and bug residue should not sit on the lenses for weeks. When washing your car, give the headlights the same attention you give the windshield and wheels. Use a clean microfiber towel for drying rather than rubbing the plastic with a rough cloth.
Keep your headlights looking their best
Once the lenses are restored, small habits can make a meaningful difference. Park in a garage or shaded area when possible, especially during long stretches of sunny weather. Apply a plastic-safe protectant if recommended by the restoration product or service provider. And do not wait until visibility has noticeably declined before checking the condition of your lights.
It is also smart to compare both headlights in daylight. If one lens is much hazier than the other, or one bulb appears dimmer, address it early. Balanced lighting helps your vehicle look better and helps you spot changing conditions on the road.
Cloudy headlights are easy to overlook because the change happens gradually. Restoring them is one of those details that can make an older vehicle feel refreshed again. When your car looks good, you feel good – and when the road ahead is brighter, every evening drive feels a little more comfortable.